|
User Manual
|
||||||
|
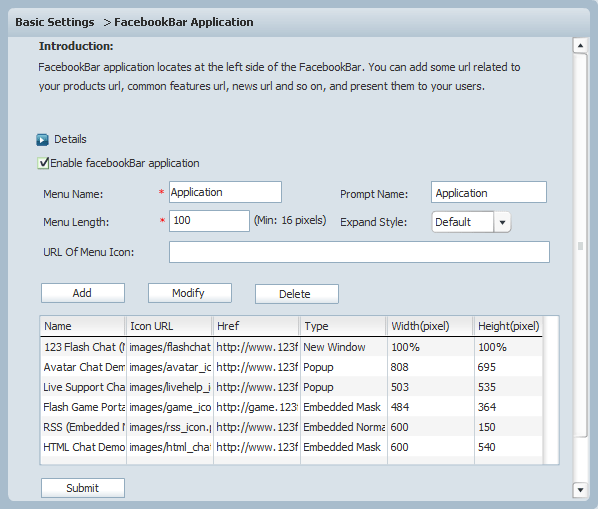
Facebook Bar ApplicationFacebookBar application locates at the left side of the FacebookBar. With it, you can add some url to promote your products, demonstrate common features of your products, publish news on new products and so on, and present them to your users. As the following picture shows, we'll guide you on how to add a facebook bar application to your webpage.
First, check "Enable facebookBar application" checkbox, inputting the related information to the corresponding fields. After that, click the Submit button to add a facebook bar application to your webpage, looking at the following picture.
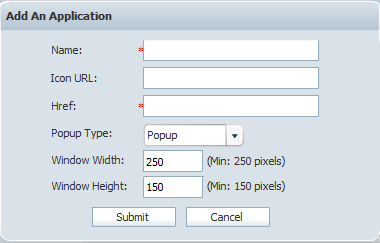
If you want to add sub items into it, please click the Add button in the first picture above. Then the following panel will popup. And then input the relevant information into the corresponding fields.
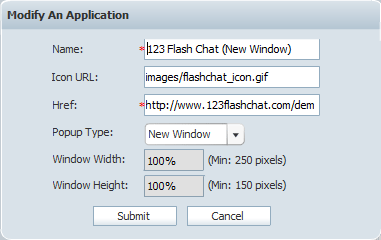
Note: The field with "*" is the required one that needs to be filled in. If you want to set the size for the sub item, you should select another popup type in the "PopUp Type" dropdown list. If you want to modify a sub item you added before, please select it with your mouse and click the Modify button. Then the following panel will popup. Modify the information that you want and click the Submit button to save your modifications.
If you want to delete a sub item you added before, select it with your mouse and click the Detelet button to delete it.
Related links:
|
|||||
 |
 |


Copyright @2001-2010 TopCMM Software Corp.